The hip flexor muscles are critical to our everyday function. Think about it. Without healthy hip flexors, we would not be able to walk with our loved ones, climb the steps into our homes, or walk around the park. Unfortunately, the hip flexor muscles get worked so often that they become tight and actually limit the activities these muscles help us do.
Therefore, it is important to have this best hip flexor routine ready so you can focus on improving the mobility of the hip flexors. This hip flexor mobility routine can help improve back pain, increase walking distance, and increase your overall standing tolerance. Incorporating the following 3 activities into your routine can improve the health of the muscle. Read to the end for an extra exercise that is gold for hip flexors. First, let’s learn what your hip flexor muscles are.
What are the Hip Flexors?
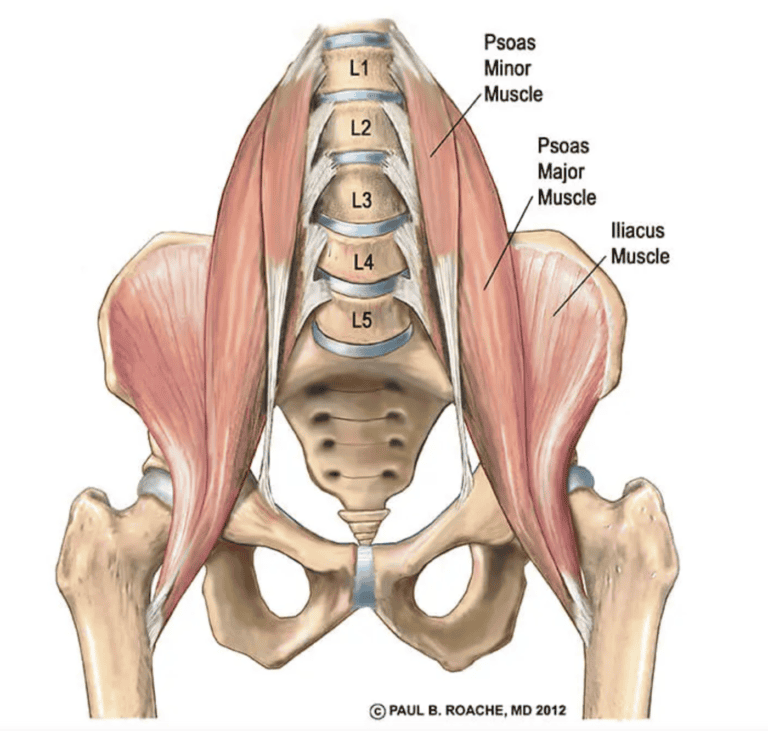
The hip flexor muscles are found in the front of your hip joints. There are two primary muscles that make up a majority of your hip flexion activity. The muscles are the iliacus Muscle and the psoas Muscle. You can see the iliacus muscle begins in the pelvis and the psoas muscles on the lumbar spine.
The two muscles, Iliacus and Psoas, work together to bring your hips towards your shoulders. Unfortunately, these muscles have a weakness. If you reverse this movement, move your knee away from your chest, you can stretch the two muscles.
The Weakness of the Hip Flexors
The weakness of the hip flexors is not necessarily the fault of the muscle. It is the fault of a person’s lifestyle. Because the activities that fill up our day oftentimes involve sitting, the muscles in the front of the hip become tight. As with anything else in the body, if the muscle is not stretched and used frequently throughout the day, it becomes less functional. Tight muscles are naturally weaker.
As the old saying goes,
“If you don’t use it, you lose it.”
Let’s learn how to keep our hip flexors moving and ready to help when we need them. The routine I am introducing you to today has three main components.
First is tissue work. Be sure to address areas of tightness with the appropriate tools so you can get the best benefit from the routine. Second is mobility work. Oftentimes called stretching, we like to call it mobility work. Finally is neuro reactivation. Being sure to include all three, allow for the greatest gains.
The Best Hip Flexor Routine for Mobility in 3 Easy Steps
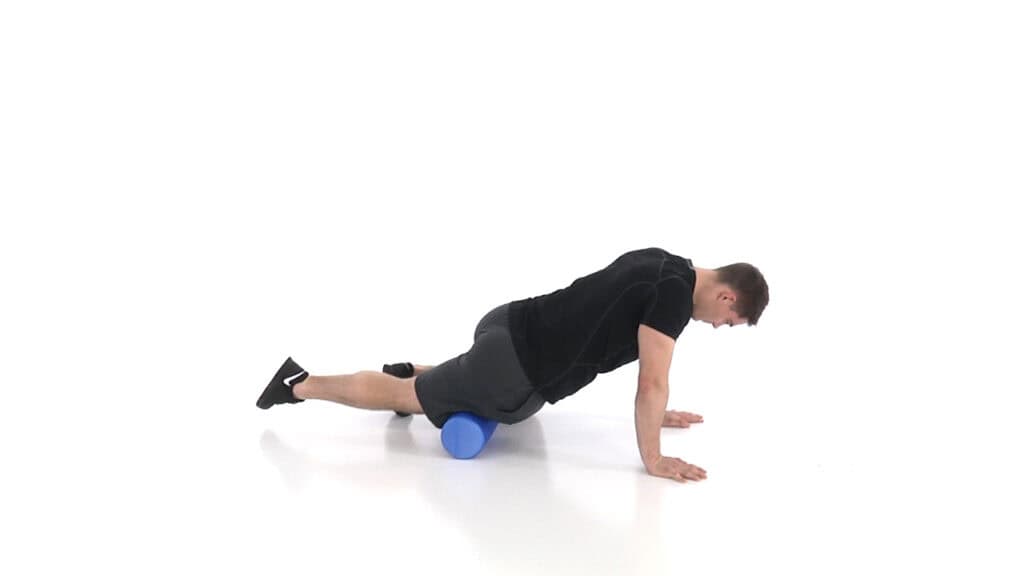
1. Foam Roll the Quadriceps
Source: functionalmovement.com
How to Set-Up for the Exercise: We begin this exercise in the hands and knees position with the thigh being treated placed directly on top of the foam roller with both hands/elbows supporting body weight.
The Rolling Action: Next, roll the thigh muscle across the foam roller from high to low and outside to inside focusing on the areas of greatest ‘discomfort’. Make sure you get the muscle high up in the front of the hip and thigh.
Do not perform this exercise to the point of significant pain. Stopping just short of the point of pain will help to you get the greatest relaxation in the thigh muscle. Repeat the same way on the opposite leg.
To do this exercise, you will need a foam roll. Check out this link for a great option if you are needing to purchase one.
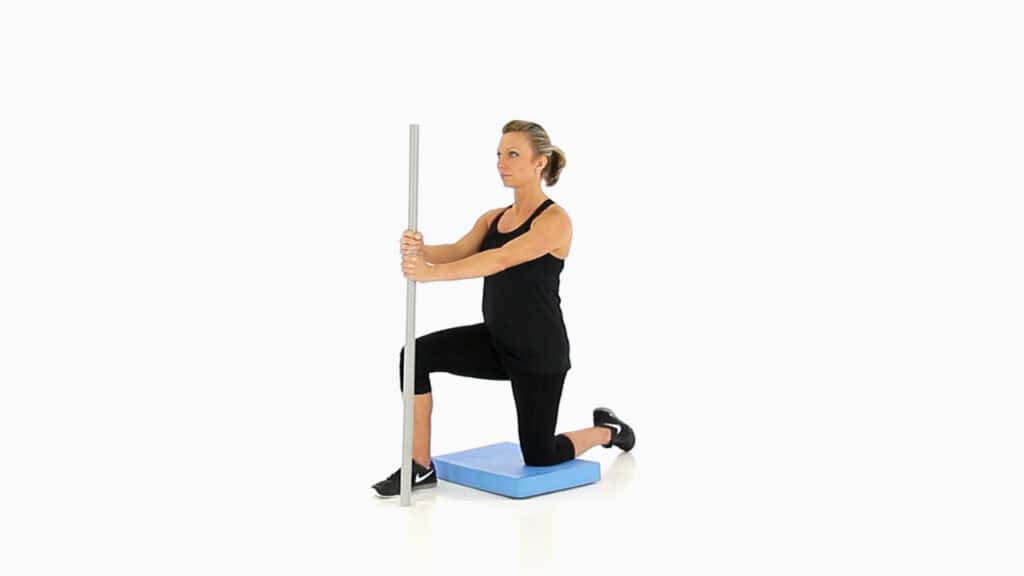
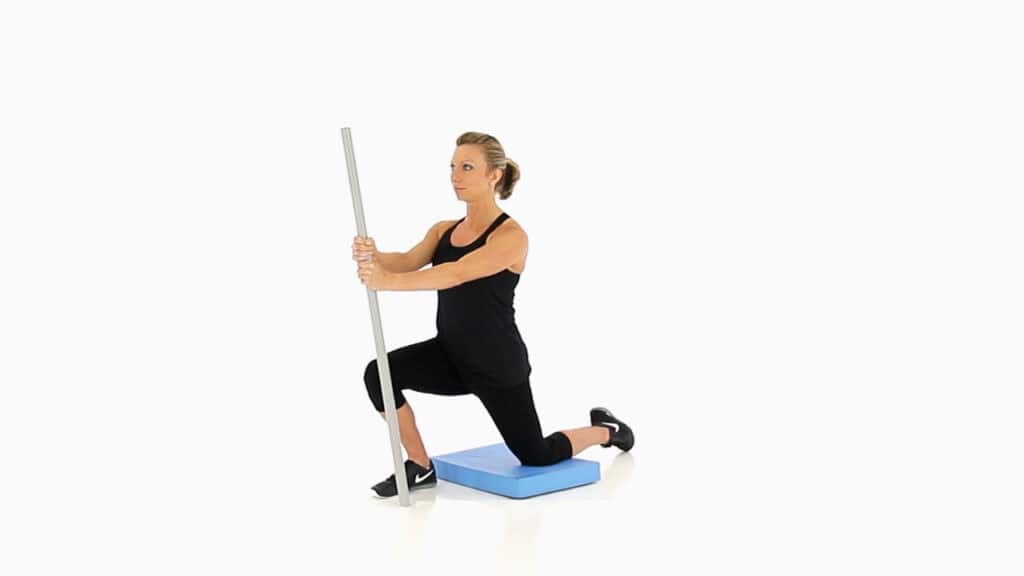
How to Set-Up for the Exercise: Take a half kneeling position on a pad, towel, or mat and place the dowel or broomstick in front of the body. Be sure to maintain a tall spine. Legs are hip width apart.
The Stretching Action: Engage the buttock muscles and press stick down into the floor. This is to engage your abdominal muscles. Move the front knee forward while maintaining a tall spine and level pelvis. Keep your buttocks tight and tipped backwards to prevent back extension.
Return: Return to the start position and relax the arms.
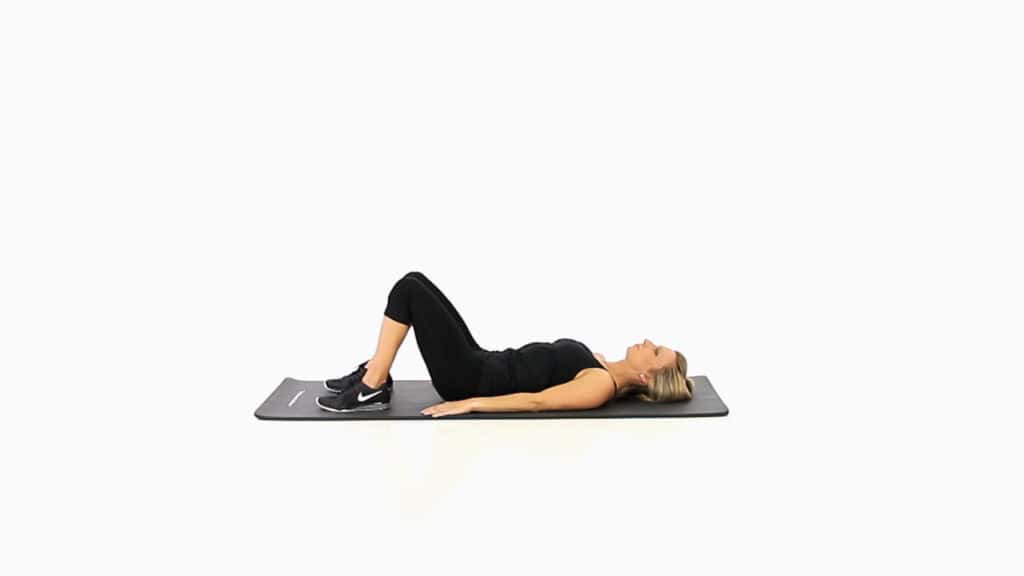
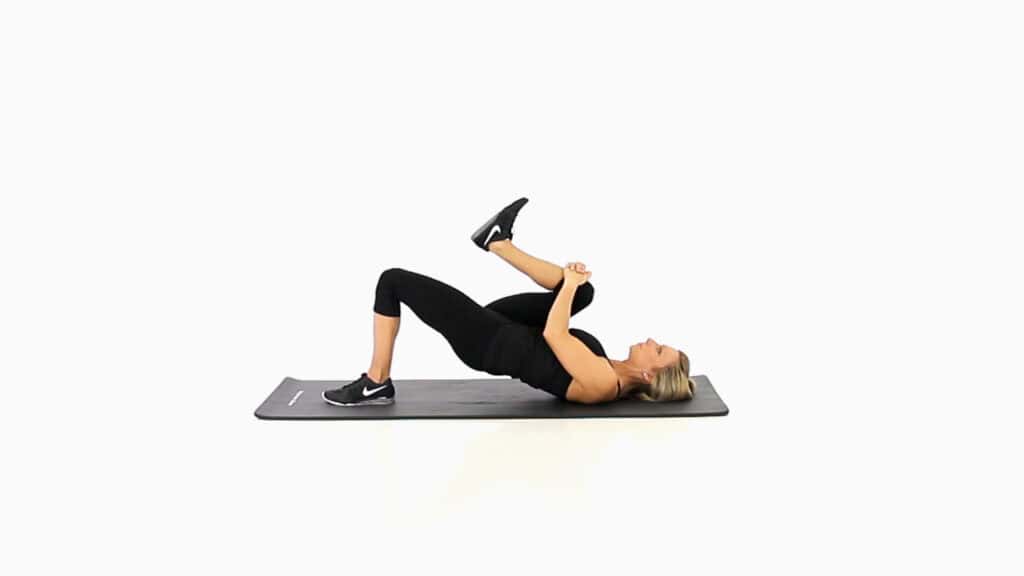
3. Leg Lock Bridge
Source: functionalmovement.com
Source: functionalmovement.com
The focus of this exercise is on hip extension while limiting your lumbar spine involvement.
How to Setup for the Exercise: Lie on your back and bend your knees so that your feet are flat on the ground. Then bring one knee up toward your chest, at least above the waistline, and hold it in place with both hands.
The Lifting Action: Press through the heel of the foot on the ground to lift the hips evenly off of the floor until there is a straight line from your shoulders to your hip and knee. Do not let your knee to rotate or fall out to the side during the lift.
Return: Once you achieve a full lift of the hip and alignment with the shoulder and knee, slowly lower your hip back to the floor.
Extra Exercise for the Hip Flexors
Since you made it this far, I want to provide you with a quick video demonstrating a golden exercise for you mobility routine.
It is critical when you are stretching the hip flexors, you do not bend your back backwards at the same time. Using the stretch in this video, you will see how to limit this motion.
Having the best hip flexor routine is only the beginning of your health journey. Making sure you are breathing well while performing your exercises, adding some strength with a TRX program, or progressing any other activities you add as you head into your fitness ideas for the year to come should be added incrementally and with purpose.